Does a clean engine bay matter if you never see underneath the bonnet? Believe it or not there are several benefits to cleaning your engine bay. Dirt and grit could cause the pulleys and bearings to wear out prematurely or could even hide serious issues like gasket leaks.
A clean engine bay helps the engine stay cooler, pushes up your efficiency and keeping your resale value at the higher end of the wedge. The trick with cleaning is not to be scared of damaging the engine, as it is designed to take a load of punishment. But draw the line at power hosing as this can take off a little more than a layer of grease. As long as you take care whilst cleaning this can be incredibly good for your engine.
Simply follow our simple instructions to start the process:
What You’ll Need
Bucket
Water hose
Plastic bags
Drip pan
Absorbent pads
Car wash mitt
Wash brush
Car wash soap
Engine degreaser
Clean terry or microfibre towels
Plastic and metal polish
Air compressor (optional will help)
And the process
Step 1
Always go for cleaning on a sunny day. You’re introducing water into sensitive areas of your car so you want it dry off quickly. Start early in the morning before using your car, or if you must run your engine wait until it’s cooled off for at least an hour.
If the engine and ambient temperature is really cold then it may help to turn it on the engine for a couple of minutes as a slight heat will help loosen up the grease especially in the winter months. Whatever you do, avoid pouring cold water on a hot engine as this can cause cracking and structural problems with the steel.
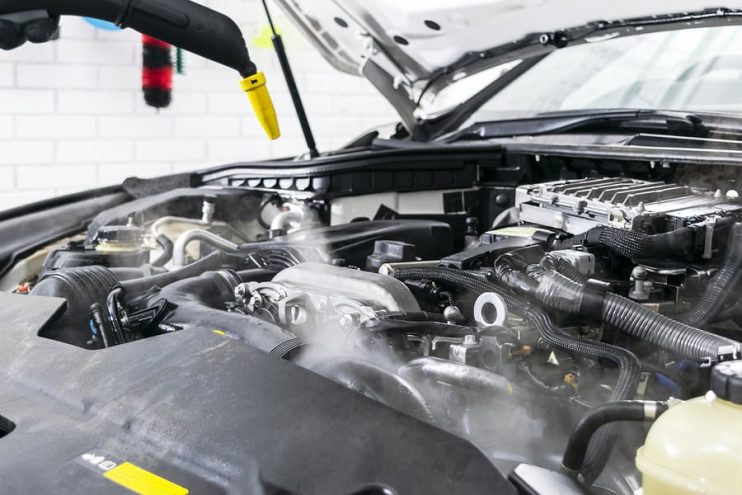
Parking in the shade on a hot day alternatively can help you stop getting the dreaded dried on soap. A pre rinse helps you get rid of the debris. Put down drip pans and pads to stop the gunk going into your garden. A hose can help but too much pressure is not beneficial to the lifespan of the engine.
Step 2
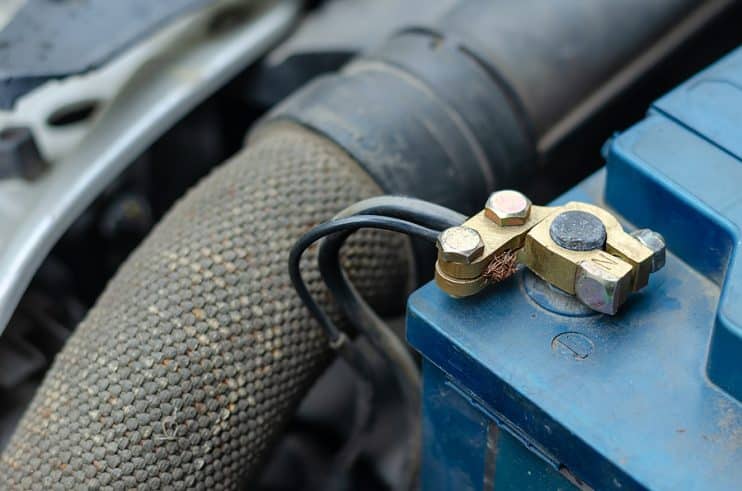
Disconnect the negative battery terminal, cover with a plastic bag and do the same with the alternator, carburettor and distributor in older cars. In newer vehicles cover the alternator and be very careful around the coil packs and fuse box, as even though these parts have a resistance to water, there’s a big difference between a little damp in the air and direct contact with fluid. Short circuits are definitely not what you want, so cover any custom electric mods you might have too.
Step 3
Spray the engine bay with compressed air or a can of compressed air to get rid of any loose debris. If you don’t have access to either of these, then a good rub down with a stiff brush can be the very next best thing.
Step 4
Apply degreaser liberally throughout the engine bay and don’t hold back on those really oily parts. Let it sit and get to work for around 2-5 minutes depending on the level of dirt. To help the chemicals do their job you can employ your nylon wash brush on the filthiest areas and the aluminium brush on the metal parts. Don’t let the degreaser dry out.
Step 5
Rinse with a low pressure stream of water from a hosepipe or water spray compressor. Work gently from the back of the bay to the front and keep the head moving so it doesn’t sit in the nooks and crannies. If you have really worked the dirt into your engine over the miles, you may need to repeat and rinse again, otherwise go on to the next step.
Step 6
Use a car soap to clean out the parts in the same way as you would do with the bodywork. Grab that car mitt and scrub away with the same action and energy as you would with a dirty panel. When you’re happy with the finish simply rinse away all the suds.
Step 7
This is where compressed air is a real bonus. Quickly dry the engine bay with the hose and you can avoid getting water onto the sensitive parts of the engine. Remove the plastic bags from the electrics in the engine and you can now give them special attention and clean them by hand with a damp toothbrush and cloth. These precision cleaning implements will allow you to direct the water and soap without fear of causing any damage.
Step 8
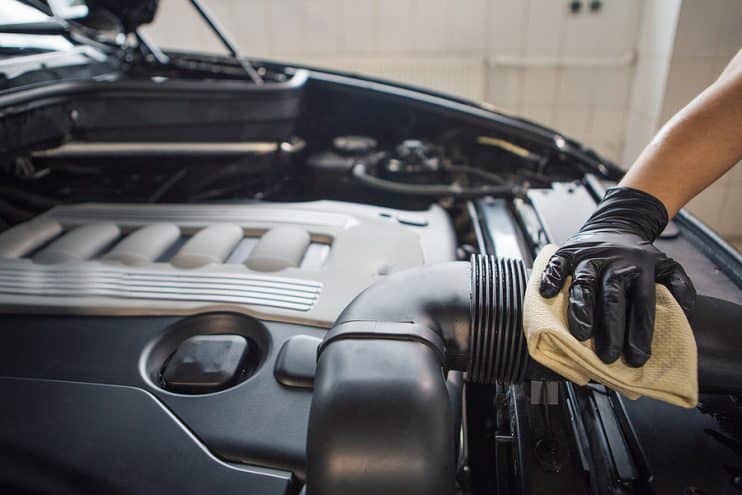
The final stage is to use a plastic cleaner to restore shine to engine bay plastics and hoses. Apply the solution with your terry cloth and use a lighter microfibre cloth to remove the solution. Metal polish can be applied with a clean cloth to the metal parts of your car until it turns black and then wipe it off with a different cloth. When you have finished park in the sun and lift the bonnet and allow the sun in all its glory to dry and apply a rust proofing spray.
Our Top Tips
Some engine cleaners can remove that thin layer of wax that you have applied to the paint of your car. Watch out for spills on the wing of your car or overspray marks – whilst wiping it away will do no good, you can re-wax the parts it’s affected.
Be aware that many plastic cleaners can take up to 6 hours to dry for full protection from grease and dirt.
Water is not as dangerous as you think it might be to your engine. Small amounts will do little harm. Remember that on a wet day, spray from the road will get into the engine so it’s built to resist the damp.
For the best look and performance try to clean and protect your engine bay at least twice a year.
A Final Word
A clean engine simply looks so much better, so take the time to clean it up. A ten-year old vehicle can look much younger with a clean engine bay and remember that even though the first clean may be a little of a longer ordeal, once you have got rid of the dirt regular wipe downs are so much easier. Use the tools and products on our list, which will become a worthwhile investment, especially when it comes to reselling your vehicle.
Disclaimer: These articles are for guidance purposes only. If you have any questions regarding any matter
relating to your vehicle we would recommend that you seek the advice of an appropriate professional.
We accept no responsibility or liability should you suffer financial or personal damages in
relation to the advice stated on this website.