Blog » How to check and replace your car’s air filter
How to check and replace your car’s air filter
Even at low speeds, your engine sucks in a huge amount of air necessary for the process of internal combustion that drives the car. This air has to be clean and free from particles such as dust and dirt, or these could clog up the engine over time causing it to lose efficiency or even break down. As a result most engines use special air filters to clean the air that they take in, trapping all the dirt and dust that could cause damage. This part has a limited lifespan before it becomes completely clogged, impeding the flow of air to the engine, and needs to be changed.
Cars with fuel injection systems usually have an air filter element that’s fixed inside an air induction assembly. This part is usually located in special box called the air cleaner housing – you’ll need to remove this by unlatching a series of clamps or unscrewing the part from its seating within the mechanism.
If your car uses a carburettor then there will most likely be a large round air cleaning system that sits on top of it. The air filter is usually found inside this and can be quickly and easily removed by taking off the fixings – often this is just a single wing style nut.
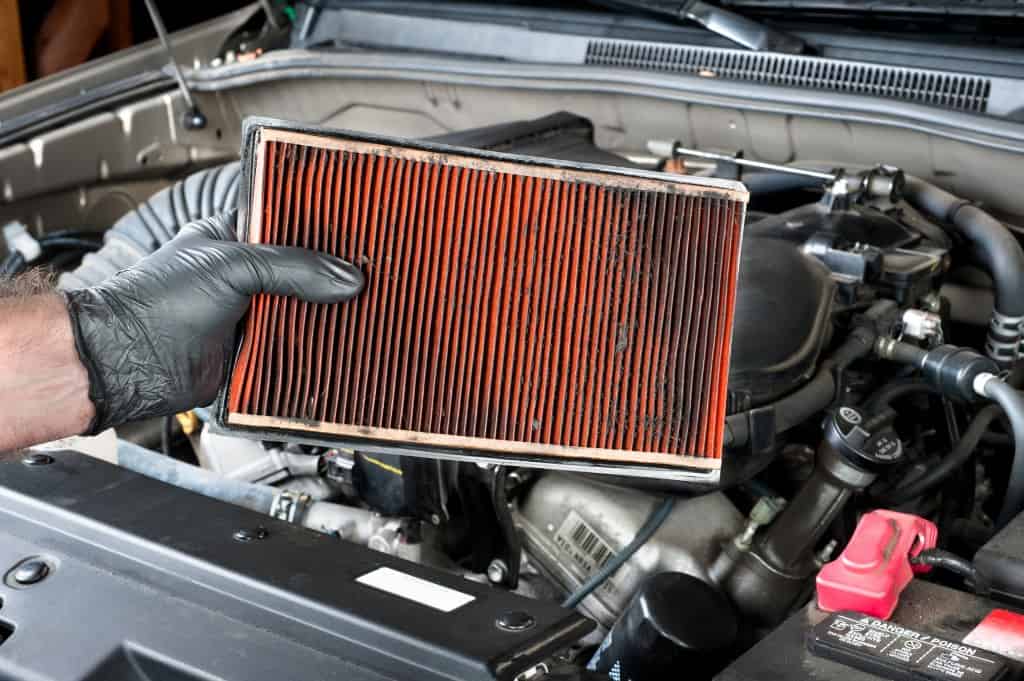
To Inspect and Change the Air Filter
Removal
First remove the air filter from its housing as described above, as appropriate to your type of engine, taking care to keep all the screws and fixings in one place. Make sure that you make notes on how the part was removed – especially if this is a complex process – so that you can be sure of the method used to reattach the part when you’ve finished the inspection.
Inspect The Air Filter
Using a desk-lamp or a similar light source, carefully inspect the air filter element. You may find an excess of oil and dirt on one side of the filter element – this is a sure sign that you’ll need to change the part. If the part is still relatively clean with little or no oil and dirt build up then it can simply be replaced in the housing.
Before fitting the new air filter it is important to compare the new part with the old part to check that these are both the same dimensions and use the same system of fixing to allow the part to be put into the engine. The gaskets on the top and bottom of the filter elements must be exactly the same, otherwise you will have problems fitting the new part into the housing, and could damage the housing if you try to force in a part that’s not designed to fit in the space.
Fitting
When you are completely satisfied that the new part matches the old then install it carefully into the housing. Make sure that the part is aligned and seated correctly – in older cars its sometimes recommended that you put a small sheen of grease on the edges of the gaskets to ensure that there’s an air tight seal between the housing and the part.
Replace all the screws or clips that hold the air filter in its housing. If you haven’t seated the part correctly then it is unlikely that these will fit back into their individual places, in which case you should remove the part and try seating it again from scratch.
Finally
A common question asked by motorists is “how often should we change the air filter in our car?”. The usual answer to this is that you’ll need to check it around every 10,000 – 15,000 miles depending on whether you live in a urban environment where there’s likely to be large amounts of dirt and dust or in the cleaner air of the countryside. It is interesting to note that a slightly dirty filter works more effectively than a completely clean filter, as the dirt and grease actually allow it to filter finer particles. If you’re having trouble judging whether or not your part is dirty enough to warrant a change then you can always take it into your local parts centre for advice.
Disclaimer: These articles are for guidance purposes only. If you have any questions regarding any matter
relating to your vehicle we would recommend that you seek the advice of an appropriate professional.
We accept no responsibility or liability should you suffer financial or personal damages in
relation to the advice stated on this website.