Your car’s engine develops rotational energy. This rotational energy is delivered to the back axle via the driveshaft. Hence if this part fails, your car will simply not move. There are a number of signs that show your driveshaft could be in trouble. These include:
Vibrations – particularly under the centre of the car whilst it accelerating or driving away. Vibrations whilst the car is at a standstill are more likely due to a faulty flywheel.
Turning Issues – if the driveshaft is playing up this will prevent your tyres from turning properly in tight situations. Usually such problems manifest when parking as a resistance in the steering wheel.
Unexpected Noise and Clatters – strange sounds coming from the back of your car, such as a squeaking upon acceleration that dissipates when you hit a high speed, or rattling or clunking.
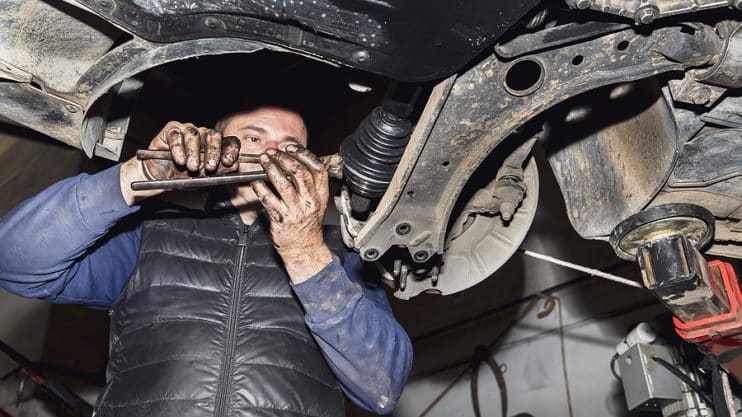
Visible Damage – look underneath your car at the universal joints that sit either end of your driveshaft. Signs that these joints are worn or rust around the edges indicates that there could be problems.
If you do find your driveshaft is not working properly then changing this part is a job that you can do in your home garage. It is not the simplest of tasks due to the access required to get at the driveshaft, and should only be attempted by someone with a modicum of mechanical knowledge.
You will need: spanner set, car ramps and jack stands, crowbar.
Support the Vehicle
Firstly you will need to support the car. Either use a jack and jack stands to raise the car or drive it up onto wheel ramps and then put the car into neutral gear. This should give you room to use a backboard to slide underneath the vehicle.
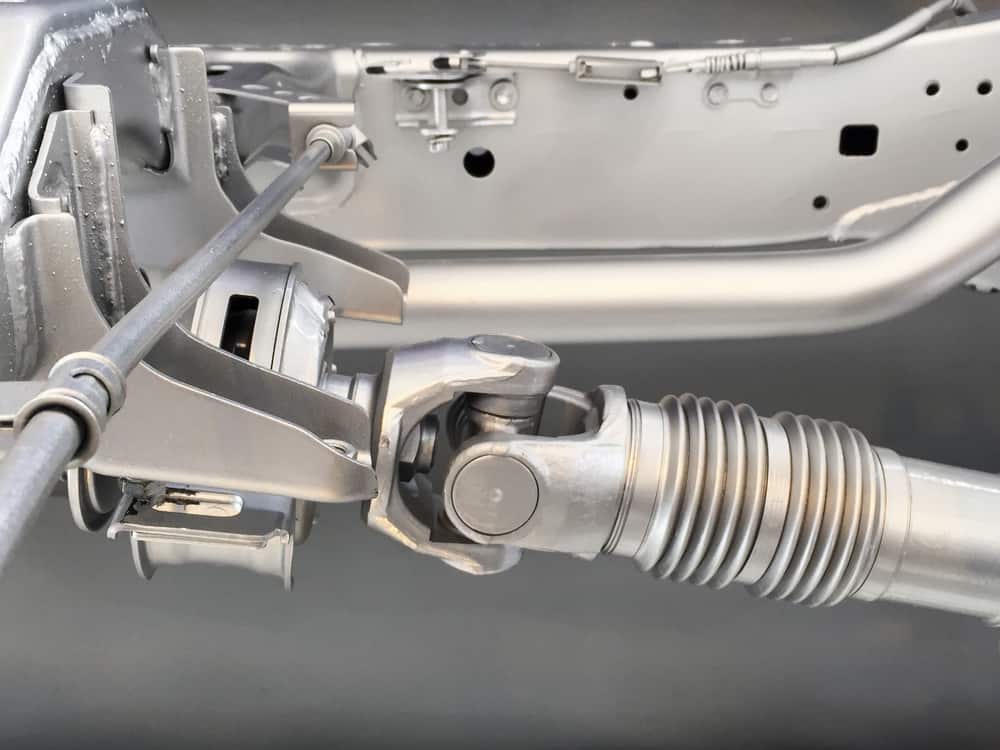
Locate the Rear Yoke
Look at the connector around the rear yoke and mark the end of the old driveshaft, to give you a positional reference when you fit the new driveshaft. If you are dealing with an automatic vehicle, put the emergency brake on to stop the driveshaft rotating, or with a manual transmission simply put the car in gear. This will stop the shaft from rotating when you start to unbolt it from the rear yoke.
Disconnect the Driveshaft
Unscrew the bolts from the rear yoke. This may require you to take off the emergency brake, or put the car into gear in order to turn the driveshaft and access each individual bolt. When all of these are removed, use the crowbar to pry the driveshaft out of its seating at the rear yoke. Next you’ll want to disconnect the driveshaft from the transmission by pulling it out of its housing.
Attach the New Driveshaft
Put the new replacement driveshaft into position in the transmission by slowly rotating it until it firmly slips into place, then carefully bolt it back in place on the yoke, taking care to make sure you have the right position by comparing it to the old driveshaft. Finally bolt it to the yoke and tighten the bolts to their full limit.
The cumbersome nature of the driveshaft is what makes this mechanical operation tricky. You should therefore be able to observe by eye that the driveshaft is correctly fitted to your vehicle. However before going out on the road, you may still wish to test drive your car at slow speeds on local byways.
Disclaimer: These articles are for guidance purposes only. If you have any questions regarding any matter
relating to your vehicle we would recommend that you seek the advice of an appropriate professional.
We accept no responsibility or liability should you suffer financial or personal damages in
relation to the advice stated on this website.
 Your car’s engine develops rotational energy. This rotational energy is delivered to the back axle via the driveshaft. Hence if this part fails, your car will simply not move. There are a number of signs that show your driveshaft could be in trouble. These include: