The flywheel is the part of your car that stores rotational motion whilst changing gear. As with all moving components in your engine it can degrade over time, and will eventually need replacing. Some of the key indicators that you’re having problems with your flywheel include vibration whilst allowing the engine to tick over, or a juddering feeling when starting the car. It is also common to hear a kind of cluttering noise whilst changing between gears.
Replacing the flywheel as soon as you suspect any kind of problem is vital to protect other parts of your gearbox. This is a moderately difficult task. It should only be undertaken by reasonably experienced mechanics who understand the layout of the engine and the function of its component parts.
You will need: torque spanner, spanner set, wrench, socket set, car jack, jack stands
Place car on jacks and remove battery cables
After you’ve parked the car on a level surface, jack up the car and support it from at least four frame points, ensuring that it is at least 600mm off the floor in order to give you access to the flywheel. Next open up the car’s bonnet and remove the positive cable from its terminal on the battery.
Remove the Driveshaft
Next disconnect the universal joint that secures the driveshaft to the rear axle connector. There should be two U-bolt that hold this in place, remove these first and then carefully rotate the axle until the universal joint frees from the connector. This should allow you to safely remove the driveshaft.
Disconnect the Transmission and Fluid Pan
Loosen the torque convertor bolts that hold the transmission to the flywheel. There will usually be six bolts that should all be loosened first, to prevent uneven pressure being placed on the remaining bolts when they are removed. Following the removal of these bolts place a floor jack underneath the transmission pan, using a piece of plywood in-between the jack plate and the transmission to prevent damage. Wind the jack high enough to take some of the weight off the transmission and cross-member.
Loosen all Connecting Bolts
Locate and unscrew all bolts that hold the transmission in place together with the cross-member fasteners. With all of these loosened, it will only be the bell-housing nuts that hold the transmission fast against the engine block. As a result you may need to gently readjust the weight distribution on the jack to make sure the transmission stays well supported.
Remove Additional Components and Transmission
With the transmission still in place, disconnect the speed sensor, the gear shift links and the transmission temperature gauge using small spanners, and then use pliers to pull out the gear shift link pin. Remove all the wires that are linked up to the transmission. Next remove the fill pipe bolt and the fill pipe, before carefully removing all the bell-housing nuts that hold the transmission in place. The transmission will now sit on two alignment pins, allowing you to pull it away from the engine block so that it’s resting on the car jack. Finally lower the jack until the transmission can be taken away from underneath the vehicle.
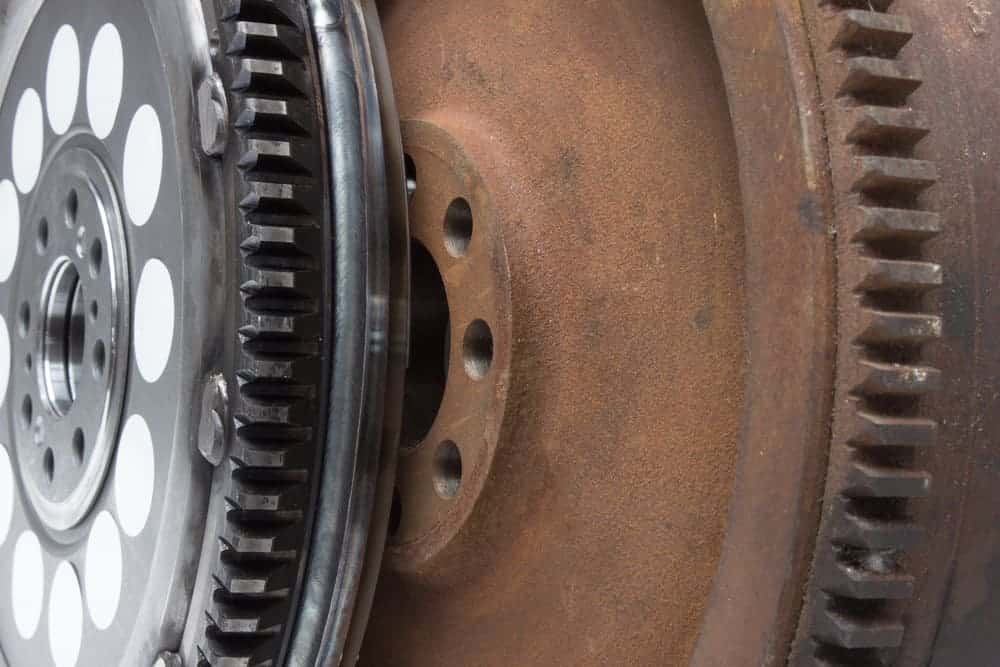
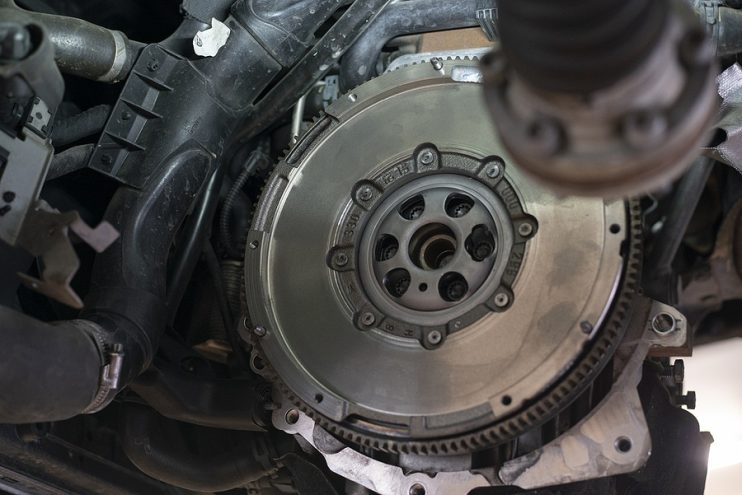
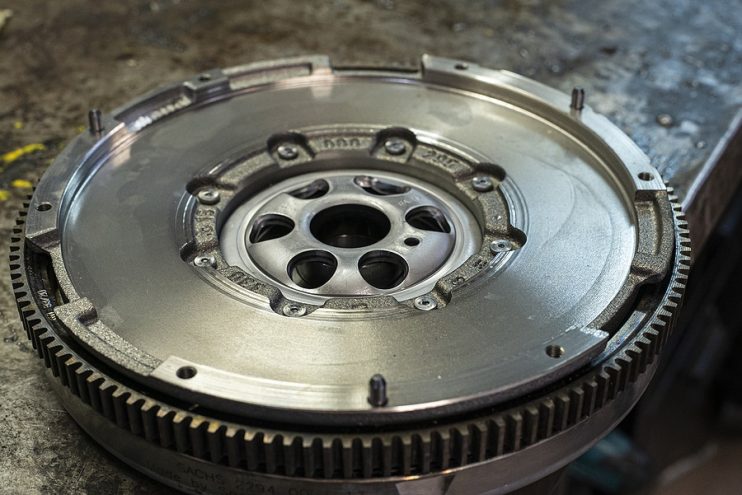
Change the Flywheel
Grip the flywheel firmly with a pair of vice grips, these will prevent the flywheel from turning as you try to loosen the connecting bolts, forming a stopping point as they catch against the frame of the car. When you have removed all the bolts, carefully pull the flywheel off the end of the crank shaft. Next, centre the replacement flywheel over the bolt opening and push it into place on the crank shaft, before tightening the bolts using the torque spanner to the required tightness as stated in your owner’s manual.
Reinstall Transmission
Raise the transmission back into place using the car jack and then loosely attach the bell-housing nuts and torque convertor bolts. Place the transmission fill pipe into the transmission, and attach the bell-housing nut that holds this in place and then tighten all the nuts so that they are fully secure. Then reassemble the cross-member and transmission mount and tighten all bolts accordingly, and install a new cotter pin for the gear shift links, and connecting all the electrical wiring.
Attach Driveshaft
The last task is to reattach the driveshaft, combining the universal joint with the rear axle connector and screwing the U-bolts back in place. Check the level of transmission fluid using the fill lines on the reservoir and if necessary top up the system with fluid. Take the car off the jack stands and you should be ready to go.
One of the most important things in this installation is to ensure that all the bolts that hold the transmission to the car are tightened to the correct level of torque. Be sure to check specific instructions for your make and model of car, as an incorrectly tightened bolt can cause immediate damage within the engine.


