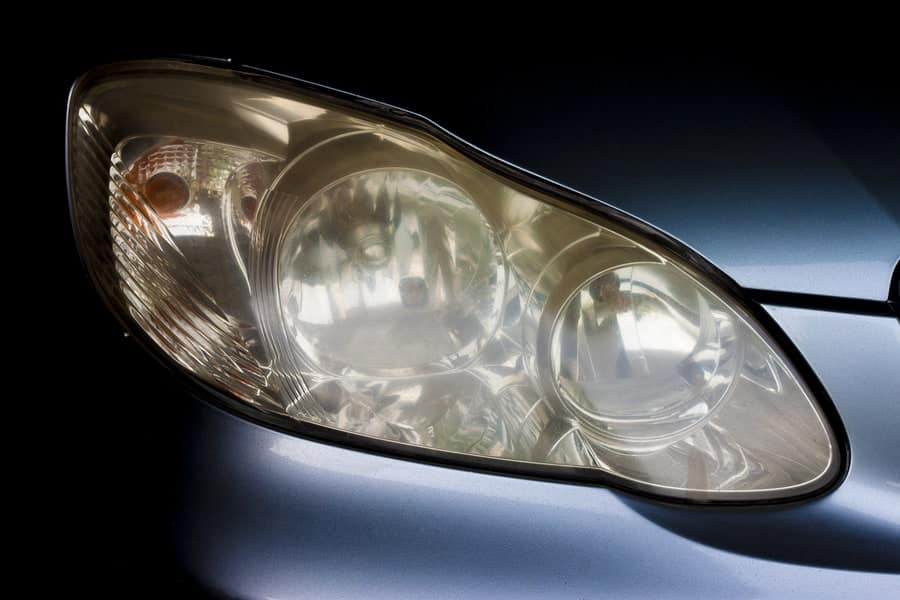
Keeping your car looking good is important. But letting others see you in the dark is vital. Headlights not only show you where to go, they also let other cars travelling in the opposite direction know you’re on the road. So when your headlights get oxidised, with the clear covers on the front turning cloudy, it’s not only your vehicle’s great profile that’s in danger of being damaged.
What’s the solution? Of course, you could purchase a new set of headlights and replace them yourself, which will leave you out of pocket, or you could follow our simple guide to restore yours to their former glory.
Table of contents:
Why Headlights Get Oxidised…
The oxidisation of your headlights is caused by the manufacturing process. Once upon a time all car headlights were made from glass. Great for clarity, but not so good if they catch a stone whilst out on the road. Then after the 1980s, manufacturers started to switch to toughened plastic, and oxidation first reared its ugly head.
Believe it or not, the tough plastic exterior of this part is actually quite porous – it’s prone to taking on water. To counter this, car makers cover it with a protective film that wears out over time, from the constant abrasion of dirt on the road through to the heat from the bulb.
Once the protective film has disappeared, the sun’s powerful UV rays cause the porous plastic to oxidise, creating that cloudy look that takes away from the power of the headlights.
Inside or Outside
Before you start any kind of cleaning job, you’ll need to check the location of the oxidation. If it’s on the outside of the headlight, then you can go ahead and follow our repair guide, however if you find that the oxidation is on the inside of the unit, then you’re probably looking at replacement headlights as this is most likely caused by moisture, which can’t be removed.
Why Repair?
The moment oxidisation starts to impact the effectiveness of your headlights, it’s a safety matter. Pure and simple. And it’s one of those problems that is only going to get worse over time.
Fortunately repairing your headlights is an easy process that only takes a few steps, and with a choice of methods you can select the one that suits you best.
Methods:
The Toothpaste Method
This works because toothpaste is a very mild abrasive, which can gently remove the layer of oxidation from the part in the same way it lifts plaque off your teeth.
You’ll need: toothpaste, a soft cloth, water, masking tape, protective gloves and some car wax for the finish.
- Clean the part to remove all the built up dirt and highway maintenance chemicals that have come into contact with the headlight over the years.
- Once the part has dried, isolate it from the rest of the car’s bodywork with masking tape, to make sure you don’t damage it during the restoration process.
- Rub a small dab of toothpaste, no more than half a teaspoon, into the light with a clean cloth. Once you’ve worked this into the part, use the same cloth with some water to remove the paste.
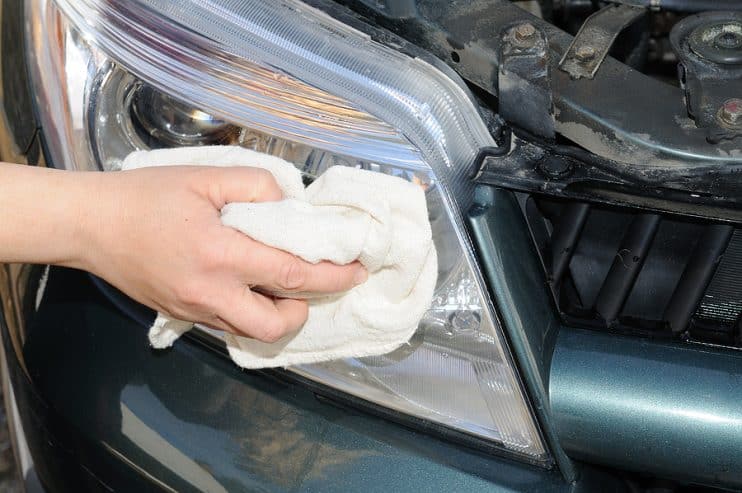
- Protect the part with your car wax or a UV protector spray.
Glass Cleaner and Polish
Again, the glass cleaner contains gentle abrasives that remove the oxidised layer, and there’s the polish to give your headlight a protective finish.
You’ll need: glass cleaner, car polish or wax, masking tape, drill buffer, soft cloth, water and protective gloves
- Clean off the dirt from the part before you start, and then mask off the affected area to stop the cleaning process impacting the surrounding bodywork.
- Spray the cleaner over the oxidised area, and then wipe it down with the cloth.
- Apply the polish to the headlight and work it in with a different cloth. For a faster finish you can use a drill with a buffer attachment.
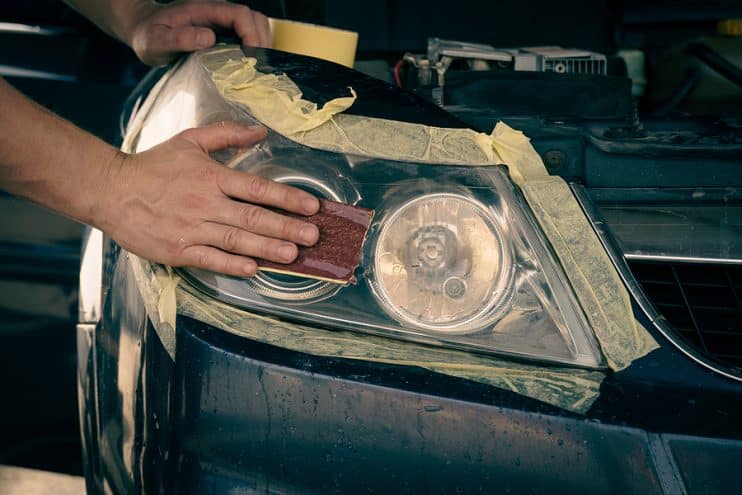
Restoration Kit
This one works for the simplest reason – it was made to remove the oxidation from your headlights.
You’ll need: a kit that comes with car wax, cleaning cloth, masking tape, mild detergent, various grades of sandpaper, and a good dose of water.
- Clean off the dirt from the headlight with the water and mild detergent, which may be included in your kit. If not use car shampoo or mild soap, but not washing up liquid.
- Mask off the headlights with tape to prevent any of the cleaning materials getting onto the bodywork.
- Apply the polishing compound to the headlight using a clean cloth. Make sure you thoroughly rub it into the plastic and when it’s complete leave to dry. Most compounds require around 5 minutes.
- Using wet sandpaper smooth down the dried compound. Start with the coarsest grade and finish with the finest, making sure in each case that the paper is wet.
- Rinse off the remnants of the polishing compound and then apply your polishing compound for a great finish.
The Last Technique
Of course, if you’re cash rich and time poor there is one final option. Take the vehicle into the mechanics where they can use a combination of very fine sandpaper or emery paper together with a pro-buffer to get the abrasion out of the surface and restore the clarity and shine. It might be more expensive than the DIY methods of this article, but it’s still a lot cheaper than going out and buying new or used units.


