Wear and tear on the front of your car soon adds up, and even a minor prang can leave your bonnet looking in a thoroughly disreputable state. You will be able to address much of this yourself with touch-ups or – if it’s bad enough – a complete respray. But in worse cases it’s far simpler to ditch the old bonnet and start again. Double-skinned bonnets are particularly hard to repair, since they cannot be hammered out. There are ways of ‘sucking’ out dents, but these are hit and miss – and, in any case, you’ll need to repaint afterwards anyway.
Fortunately, bonnets are very easy to replace yourself. All in all it should only take 15 minutes to finish the job. New bonnets are cheaply and readily available from breakers – just ensure you match the make and model exactly to your car, otherwise you’ll find that it doesn’t fit properly. You may find that you need to spray the new bonnet before fitting it – which is not a complicated job either, though it is difficult to do well and economically. Consequently, you may find it easier to take the extra time to find one the right colour – or find an expert to repaint it for you.
Remove your old bonnet
Pop the bonnet and use the prop rod to hold it up. Take a good look around at the end where it’s hinged. There will be a hinge on each side, generally with only two or three bolts holding them. There may also be pipes for the windscreen fluid. Disconnect these and unfasten the bolts using a socket set. At this point you should simply be able to lift the old bonnet off the car. You may need a second person to assist you here, since after removing the bolts it will be supported only by the prop rod. You should see marks where the old bolts were tightened on the hinge – you can use these to position your new bonnet.
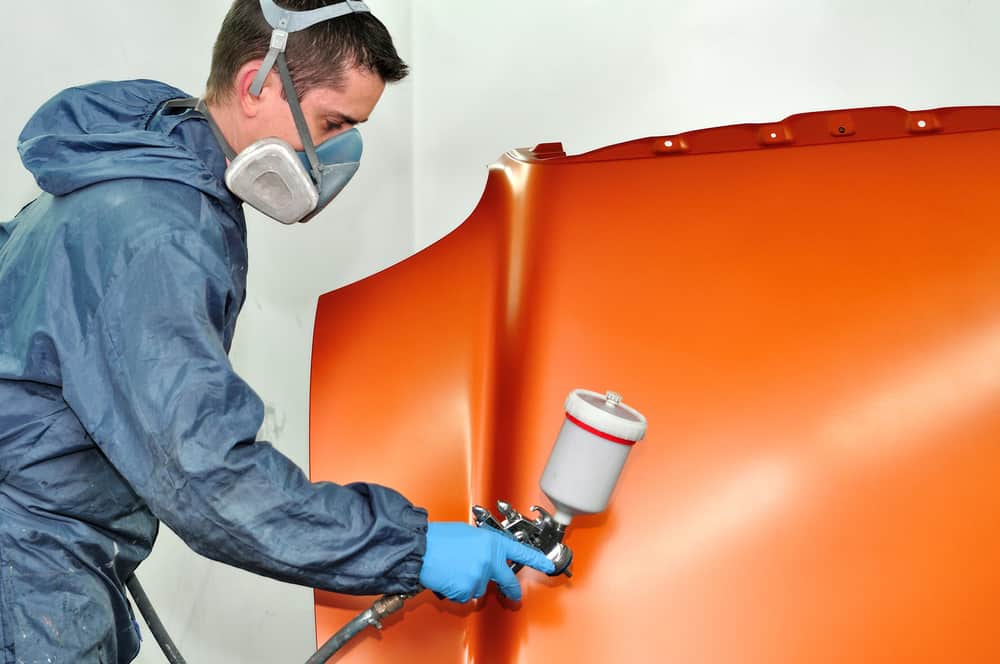
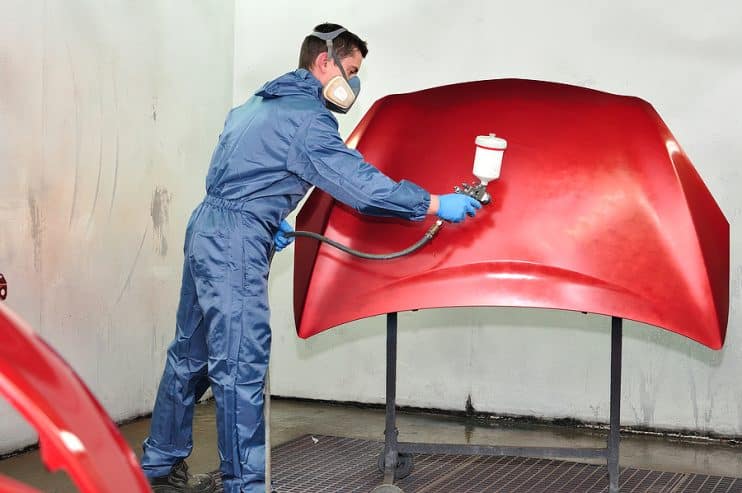
Spray your new bonnet
If you have purchased a used car bonnet from a breaker, it may or may not be the correct colour to match your car. If not, and you are determined to paint it yourself, this is best done in a well-ventilated (but not windy), clean and dust-free setting.
Start by preparing the surface so the paint has something to key on. Use light sandpaper (320 grit) to go over the whole bonnet to roughen up the existing coat of paint, working in the same direction as much as possible. Once the entire surface to be painted has a matt appearance, use a damp cloth or sponge to wipe away any dust and dirt. Dry with a lint-free cloth or towel. Remove any fittings, badges or other trimming; if you cannot take something off, cover it with masking tape.
Start by priming the bonnet. Check your spray can for specific instructions, but usually two coats will be necessary. Try to cover the surface lightly and evenly, and allow it to dry well in between coats. Rub down gently with 0000 steel wool, then wipe with a soft cloth to remove any dust.
You can now use spray paint to cover your bonnet – once again at least two and sometimes three coats are recommended. Rub with steel wool and a tack cloth again. Finally, spray on two or three coats of lacquer.
Replacing your bonnet
Fitting your replacement bonnet is just as simple as removing the old one, though you may need help to hold it in the right place while you tighten the bolts. Use the marks left by the old ones to position it correctly.
Conclusion
Bonnets are easy to source and fit, though painting them yourself can be time-consuming and costly, as well as difficult to do well. If in doubt, aim to find one that’s the right colour in the first place, or pay for a respray.
Disclaimer: These articles are for guidance purposes only. If you have any questions regarding any matter
relating to your vehicle we would recommend that you seek the advice of an appropriate professional.
We accept no responsibility or liability should you suffer financial or personal damages in
relation to the advice stated on this website.